
An email bounce check is a simple but powerful process: you verify that an email address is valid and can actually receive mail before you hit "send" on a campaign. Think of it as a crucial preventative step that protects your sender reputation and makes sure your messages land in the inbox, not the void.
Why Bounced Emails Are Silently Killing Your ROI
Before we get into the nuts and bolts of how to do this, let's talk about the real cost of ignoring bounced emails. This isn't just about a few undelivered messages. It's a direct threat to your marketing ROI, your sender reputation, and your credibility with Internet Service Providers (ISPs).
Every single bounced email sends a tiny negative signal to giants like Gmail and Outlook. When these signals add up, they paint a picture. A high bounce rate tells them you're likely sending to old, low-quality lists—a classic spammer move. The result? ISPs start routing your campaigns straight to the spam folder, even for your most loyal subscribers. That means fewer opens, fewer clicks, and, ultimately, lost revenue.
The Financial Drain of Poor List Hygiene
The damage isn't just theoretical; it has a very real financial impact. Think about all the time, money, and creative energy you pour into a campaign—the copywriting, the design, the strategy. When a chunk of those emails bounces, that investment is just gone. Worse, poor deliverability slowly erodes the trust you've built with your audience, chipping away at their lifetime value.
A proactive email bounce check isn't just another box to tick on your pre-launch checklist. It's a fundamental investment in the long-term health and profitability of your entire email marketing channel.
Recent data paints a clear picture. The average B2B bounce rate is around 2.33%. That might not sound like a lot, but for a list of 50,000 subscribers, that's over 1,100 failed deliveries with every single campaign. Each one of those is a small hit to your sender score.
Hard vs Soft Bounces: What You Actually Need to Do
Not all bounces are created equal, and knowing the difference is key to taking the right action. A hard bounce is a permanent failure, while a soft bounce is usually temporary. Here’s a quick breakdown of what they mean and what your immediate next move should be.
Bounce Type | What It Really Means | Your Next Move |
|---|---|---|
Hard Bounce | This is a dead end. The email address doesn't exist, is invalid, or the server has blocked you. | Remove immediately. There's no coming back from this. Keeping it on your list is toxic for your sender reputation. |
Soft Bounce | This is a temporary hiccup. The recipient's inbox might be full, the server could be down, or the email file is too large. | Monitor, don't delete (yet). Most email service providers will retry sending a few times. If it keeps happening over several campaigns, treat it like a hard bounce and remove it. |
Getting this right is non-negotiable for maintaining a healthy, high-performing email list.
Connecting Bounces to Campaign Success
Consistently running an email bounce check is what bridges the gap between just sending emails and actually achieving your goals. It's the step that ensures your carefully crafted message has a fighting chance to reach the person it was intended for, maximizing your opportunities for engagement and conversion.
If you want to dig deeper into the foundations of this, check out our complete guide on https://verifyright.io/en/blog/what-is-email-verification.
While tackling bounces is crucial for your bottom line, it's also about unlocking the bigger picture. When your list is clean and your deliverability is high, you can fully cash in on the powerful advantages of email marketing, from nurturing leads to driving direct sales. A clean list isn't just a "nice to have"—it's the bedrock of any successful email strategy.
Your First Quick Email Verification with VerifyRight
Theory is great, but let's be honest—seeing something work with your own eyes is what really matters. So, let's run your first quick email bounce check right now using the VerifyRight dashboard. This isn't just a tour; it's about seeing how this fits into your actual workflow.
Picture this: you've just wrapped up a meeting with a high-value prospect and need to send over a crucial proposal. The absolute last thing you want is for that email to bounce. This is the perfect time for a quick, single verification to make sure your message lands. It’s a straightforward process, and it all starts with your free account.
Finding the Single Verification Tool
Once you’re logged into your VerifyRight account, you'll land on the dashboard where all the tools are laid out. Head straight for the single verification tool. It's designed for exactly these one-off checks. No need to upload a file or mess with complex settings; it’s built for speed.
Your free account comes with credits, so you can run this bounce check and get a feel for the platform without any commitment. It's the best way to test the accuracy and speed on an email you’re not quite sure about.
Here’s what the single verification interface looks like inside the dashboard.
As you can see, it’s clean and intuitive. You just pop the email address into the field and hit the "Verify" button to get things started.
Making Sense of the Results
After a moment, VerifyRight will give you a clear status for the email address. Knowing what these results mean is the key to taking the right next step.
- Valid: The email address is confirmed to exist and can receive mail. You can send that proposal with confidence.
- Invalid: This email doesn't exist. Sending to it will cause a hard bounce, so it's time to find another way to get in touch.
- Catch-all: The server is set up to accept all mail, so it’s impossible to know for sure if the specific user exists. This is a riskier address to email.
- Disposable: This is a temporary email address. You definitely don't want to send important communications here.
This instant feedback loop is incredibly powerful. It transforms email verification from a big, periodic cleanup task into a real-time, strategic action you can take at any point in your workflow.
Integrating this simple check can also dramatically improve your data quality from the get-go. For instance, when you're optimizing your landing pages and designing lead capture forms, adding real-time verification stops bad data from ever entering your system. That saves you headaches down the road and protects your sender score from day one.
Cleaning Your Entire Email List in Bulk
Verifying emails one by one is fine for a handful of high-value contacts, but it just doesn't scale. Think about it: you're getting ready for a huge Black Friday campaign with a list of 50,000 contacts. Checking them individually is simply not an option. This is exactly where a tool like VerifyRight’s bulk email bounce check becomes essential. It lets you process thousands of contacts in one go, protecting your sender score and making sure your emails actually land in the inbox.
This isn't just about saving a few hours; it's about preventing thousands of your messages from hitting a dead end.
Preparing Your CSV File for Upload
First things first, you need to get your data ready. I've found that a little prep work here prevents the most common upload errors and makes the whole process run like a dream. While VerifyRight accepts both CSV and XLSX files, I usually stick with a clean CSV. It's just simpler.
Before you upload, make sure your file is formatted correctly:
- Single Email Column: The file should have just one column—the one with the email addresses. Get rid of any extra columns like names, sign-up dates, or anything else.
- Header Row: The very first row needs to be a header. A simple label like "email" is perfect.
- Clean Data: Give it a quick scan for obvious typos or weird formatting issues, like extra spaces or invalid characters. You'd be surprised what can sneak into a database over time.
Seriously, taking a couple of minutes to get this right will save you a headache later.
The goal is efficiency. A clean, single-column CSV is the fastest way to get your list into the system and start the email bounce check, moving you closer to a healthy, high-performing contact database.
Launching the Verification and Downloading Results
Once your CSV is prepped and ready, the rest is easy. Just head over to the bulk verification section in the VerifyRight dashboard and upload your file. The system gets to work right away, and you can watch its progress in real-time. No guessing involved.
When it's done, you can download a new, enriched CSV. This file will have your original email list plus a few new columns detailing the verification results. You’ll see a clear status for every address—'valid', 'invalid', 'catch-all', and so on.
This clean list is now your single source of truth. Use it to segment your audience, ditch the bad addresses, and keep your sender reputation intact. If you want to go deeper on this, we've got a whole guide on https://verifyright.io/en/blog/how-to-clean-email-list.
The Impact of a Clean List
The importance of keeping your list clean can't be overstated, especially when you think about the sheer scale of email today. Global email users are expected to jump from 4.83 billion in 2025 to a massive 5.61 billion by 2030. Every personalized email you send relies on accurate data, and a bulk email bounce check is the foundation of that accuracy.
Of course, before you can clean a list, you have to build one. Sometimes that involves using a tool like an email scraper to gather contacts. Just remember, any list you build this way absolutely needs to be verified to ensure you're starting with quality addresses.
Automating Email Verification with the VerifyRight API
While bulk cleaning your existing lists is a smart move, the real game-changer is stopping bad emails from getting on your list in the first place. This is where automation takes over. For developers and tech-savvy marketers, the VerifyRight API is your secret weapon for putting list hygiene on autopilot. It lets you plug a real-time email bounce check directly into your apps and forms.
Just think about it: a new user signs up on your website. Instead of blindly accepting whatever they type, your form quietly makes an instant API call to VerifyRight. In milliseconds, you get a verdict on whether that email is legit. This isn't just a defensive tactic; it's how you build a pristine database from day one. You can catch typos, fake addresses, and disposable emails before they ever become a data quality headache.
Integrating Real-Time Checks
The beauty of an API is its flexibility. You can embed this check anywhere you collect email addresses—signup forms, CRM data entry points, checkout pages, you name it. It acts as a powerful gatekeeper, ensuring only high-quality, deliverable emails ever make it through.
It’s a pretty straightforward process, turning your messy raw list into a clean, campaign-ready asset.
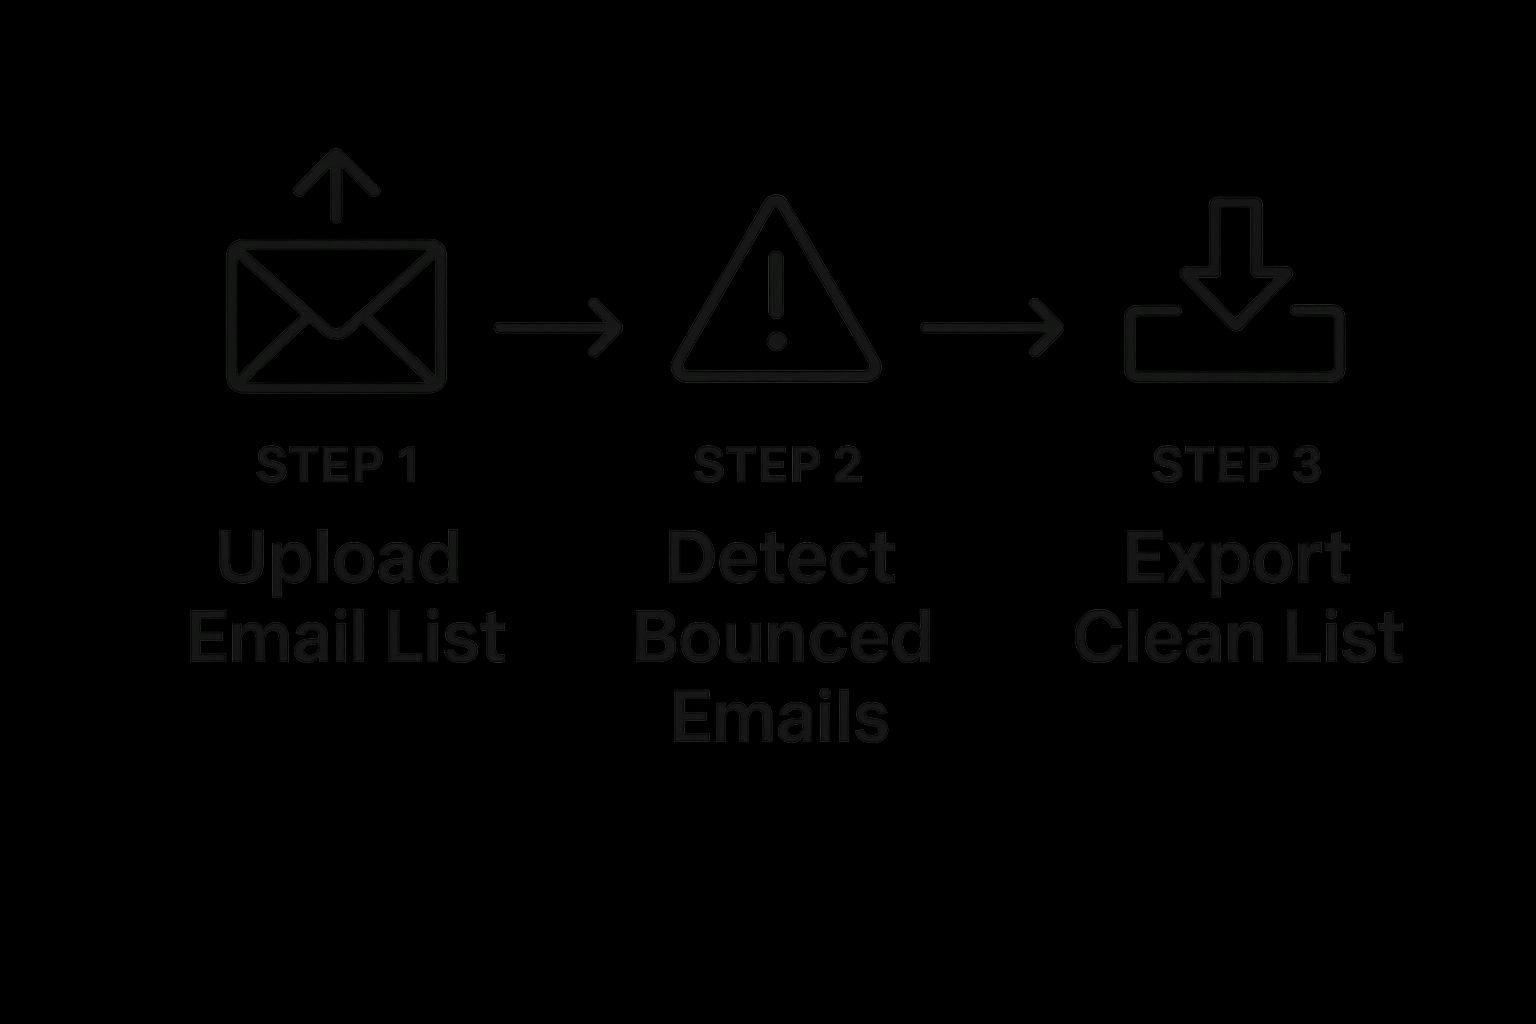
This flow is simple: you start with what you have, run it through the detection process to weed out the bounces, and you’re left with a clean list ready to go.
Handling API Responses Programmatically
Just plugging in the API is only half the battle. The real magic happens when you build a system that knows exactly what to do with the different responses it gets back. A simple API call returns a clear status, which your code can use to trigger specific, automated actions.
Let's say a user tries to sign up with a known disposable email from a service like Mailinator. The API will flag it instantly.
Your application can then display a helpful, human-friendly message like, "Please use a permanent business or personal email address." This feels much better to the user than just a generic error, all while protecting your data integrity.
This kind of immediate, intelligent feedback is what helps you build a healthy, engaged subscriber base right from the start.
To give you a better idea, here's a quick JavaScript snippet showing how you might call the VerifyRight API from a web form and handle the result.
async function checkEmail(email) {
const apiKey = 'YOUR_VERIFYRIGHT_API_KEY';
const url = `https://api.verifyright.io/v1/verify?email=${email}&key=${apiKey}`;
try {
const response = await fetch(url);
const data = await response.json();
// Programmatically handle the response based on the status
if (data.status === 'valid') {
console.log('Email is valid. Proceed with signup.');
// Add user to your database
} else if (data.status === 'invalid' || data.status === 'disposable') {
console.log('Email is invalid or disposable. Block signup.');
// Show an error message to the user
} else {
console.log('Email status is unknown. Handle as needed.');
// Maybe allow signup but flag for manual review
}
} catch (error) {
console.error('Error verifying email:', error);
}
}
To make this even more practical, it helps to have a clear plan for what to do with each response type.
Decoding API Responses for Automated Actions
Here’s a quick reference for the most common API status codes from VerifyRight and the smart, automated action your system should take for each.
API Status Code | Meaning | Recommended Automated Action |
|---|---|---|
`valid` | The email address exists and can receive mail. | Green Light: Proceed with the signup or action. Add the contact to your main list. |
`invalid` | The email address does not exist or has a syntax error. | Red Light: Block the signup. Display an error asking the user to check for typos. |
`disposable` | A temporary, throwaway email address. | Red Light: Block the signup. Ask the user for a permanent email address. |
`catch_all` | The server accepts all emails, so validity can't be confirmed. | Yellow Light: Allow signup but flag the contact for monitoring. These have a higher bounce risk. |
`unknown` | The server isn't responding or the status is unclear. | Yellow Light: Handle based on your risk tolerance. You could allow it but flag it, or ask the user to try again later. |
By coding these rules directly into your systems, you're not just running an email bounce check; you're building an intelligent, automated defense for your entire email program.
This approach transforms list hygiene from a chore you do every few months into a continuous, automated process that safeguards your sender reputation 24/7. If you're looking to dive deeper, our guide on a dedicated email bounce checker covers more advanced strategies you can put into play.
A one-time email bounce check is a fantastic start, but let's be honest—the real magic happens when you make it a habit. True success in email marketing isn't about a single big clean-up. It's about building a long-term maintenance routine that keeps your lists healthy and your sender reputation solid. This is about shifting from reactive cleaning to proactive, scheduled hygiene.
Without a regular schedule, your list quality will inevitably slip over time. People change jobs, ditch old email addresses, or just make typos. A simple, effective routine stops this decay before it starts.

Setting a Realistic Verification Schedule
The key here is to create a schedule you'll actually stick to. For most businesses I've worked with, a quarterly bulk verification is a great baseline. Think of it as a seasonal check-up for your most valuable marketing asset.
On top of that regular schedule, there are specific moments when an email bounce check is absolutely non-negotiable:
- Before a Major Campaign: Got a Black Friday sale or a huge product launch coming up? Run your entire list through a bulk verifier about a week beforehand. This ensures you get maximum reach when it matters most.
- For Re-engagement Campaigns: Trying to win back a segment of users who haven't opened an email in 90 days? A lot can change in three months. Verify those addresses first to avoid a high bounce rate that could torpedo your sender score.
- After a Large Import: Bringing in a new list from an event, a partnership, or a lead magnet? Clean it before you even think about merging it with your main database.
The goal is to make list verification a natural part of your campaign workflow, not an afterthought. Integrating these checks into your pre-launch checklist transforms it from a chore into a strategic advantage that protects your investment.
Dealing with Tricky Catch-All Domains
One of the most common questions I get is about handling "catch-all" or "accept-all" results. These are email servers set up to accept any email sent to that domain, which means an email bounce check can't confirm if a specific user inbox actually exists. Sending to these is a calculated risk.
My advice? Segment them. Don't just delete them, but don't treat them like fully validated emails, either. Create a separate segment for all your catch-all addresses and send them a low-risk engagement campaign. Watch the bounce rates like a hawk. If they perform well, great—keep them. If you see bounces, get them out of there immediately.
Why Mobile Makes a Clean List Essential
This kind of consistent upkeep is more critical than ever because of how we all read email now. The shift to mobile has completely changed the game. Globally, mobile clients are poised to account for about 41.6% of all email opens, and a staggering 75% of Gmail users check their inbox on a mobile device.
Mobile users have zero patience for errors or messages that don't load right. You can explore the full report on Porch Group Media to learn more about these email trends. A clean, verified list is the first step to ensuring your emails are delivered and render perfectly on any screen, protecting both your user engagement and your bottom line.
Common Questions About Email Bounce Checks
Even with a solid plan, a few questions always pop up. It's completely normal. Let's walk through some of the most common ones I hear from marketers about email bounce checks so you can move forward with total confidence.
Getting these final details sorted is often the last step before making this a core part of your email strategy.
How Often Should I Check My Email List?
This is a great question, and the answer depends on your sending habits. For the best results, you should aim to clean your entire list at least once every quarter. Think of it as routine maintenance to catch emails that naturally go bad over time.
But there are other key moments, too. Always run a verification pass right before a major campaign, especially if you're hitting a segment that hasn't heard from you in over 90 days. For new subscribers, the gold standard is using a real-time API to check emails the second they hit "subscribe."
Will a Bounce Check Hurt My Sender Reputation?
Not at all—it does the exact opposite. A quality email bounce check is a behind-the-scenes process. It never actually sends an email to the address. Instead, it uses technical protocols to ask the mail server if an inbox is valid.
By weeding out the bad emails before you send, you slash your bounce rate. This is one of the single most impactful things you can do to protect and even boost your sender reputation with giants like Gmail and Outlook.
An email bounce check is purely preventative. It signals to ISPs that you’re a responsible sender who maintains a clean, high-quality list—and they love to see that.
What Is the Difference Between Invalid and Catch-All?
Understanding this distinction is absolutely crucial for managing your sending risk. It's not as simple as "good" or "bad."
- An Invalid email means the address definitively does not exist. It's a dead end. Sending to it will always result in a hard bounce, so you should remove these from your list immediately. No exceptions.
- A Catch-all (or accept-all) status is trickier. It means the server is set up to accept mail for any address at that domain, so it's impossible to know for sure if a specific inbox exists without actually sending an email.
Catch-all addresses are much riskier. I recommend segmenting them and keeping a close eye on their engagement.
Can I Reliably Check Gmail or Yahoo Addresses?
Yes, absolutely. A professional email bounce check service like VerifyRight is built to handle the big providers like Gmail, Yahoo, and Outlook. These services use sophisticated methods that can determine an inbox's validity without running into the tough security measures these platforms have in place.
This is essential for most B2C marketers, since a huge chunk of your list is likely made up of these popular consumer email addresses. You can clean your list with confidence, no matter who the provider is.
---
Ready to stop guessing and start verifying? Sign up for VerifyRight and get 200 free verification credits every month to see the difference a clean list makes. Start protecting your sender reputation today at https://verifyright.io.